


21 Easy Halloween Pumpkin Carving And Painting Ideas To Make You Stand Out
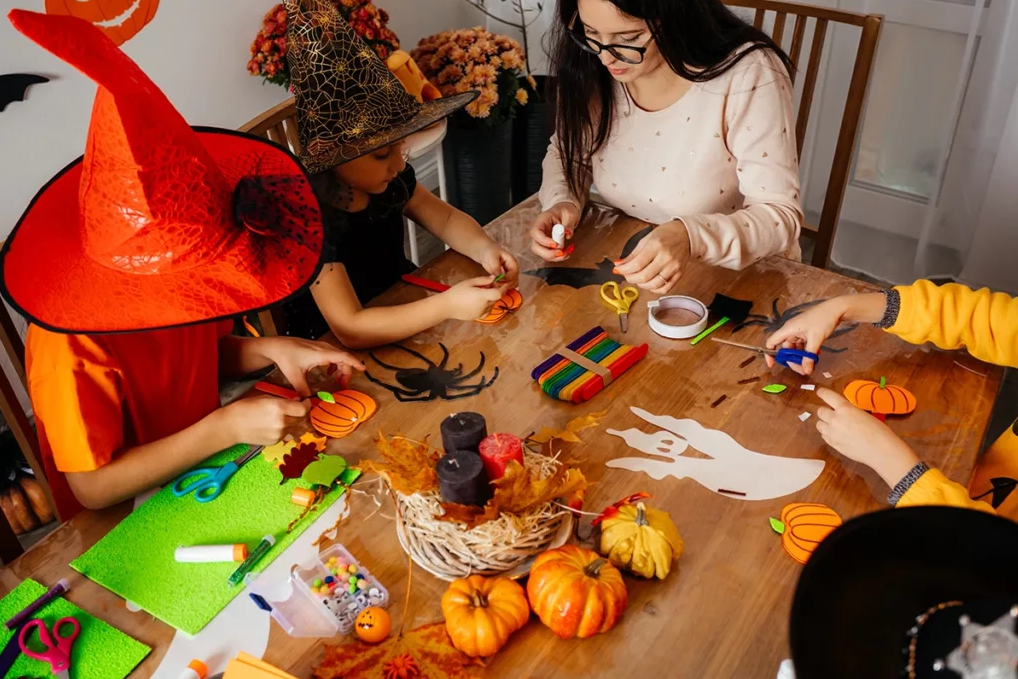
It’s that time of year again! Halloween is just around the corner, so it’s time to start thinking about pumpkin ideas. Whether you’re carving or painting your pumpkin, we’ve got you covered. In this blog post, we’ll give you some tips and ideas for how to make your pumpkin stand out this Halloween.
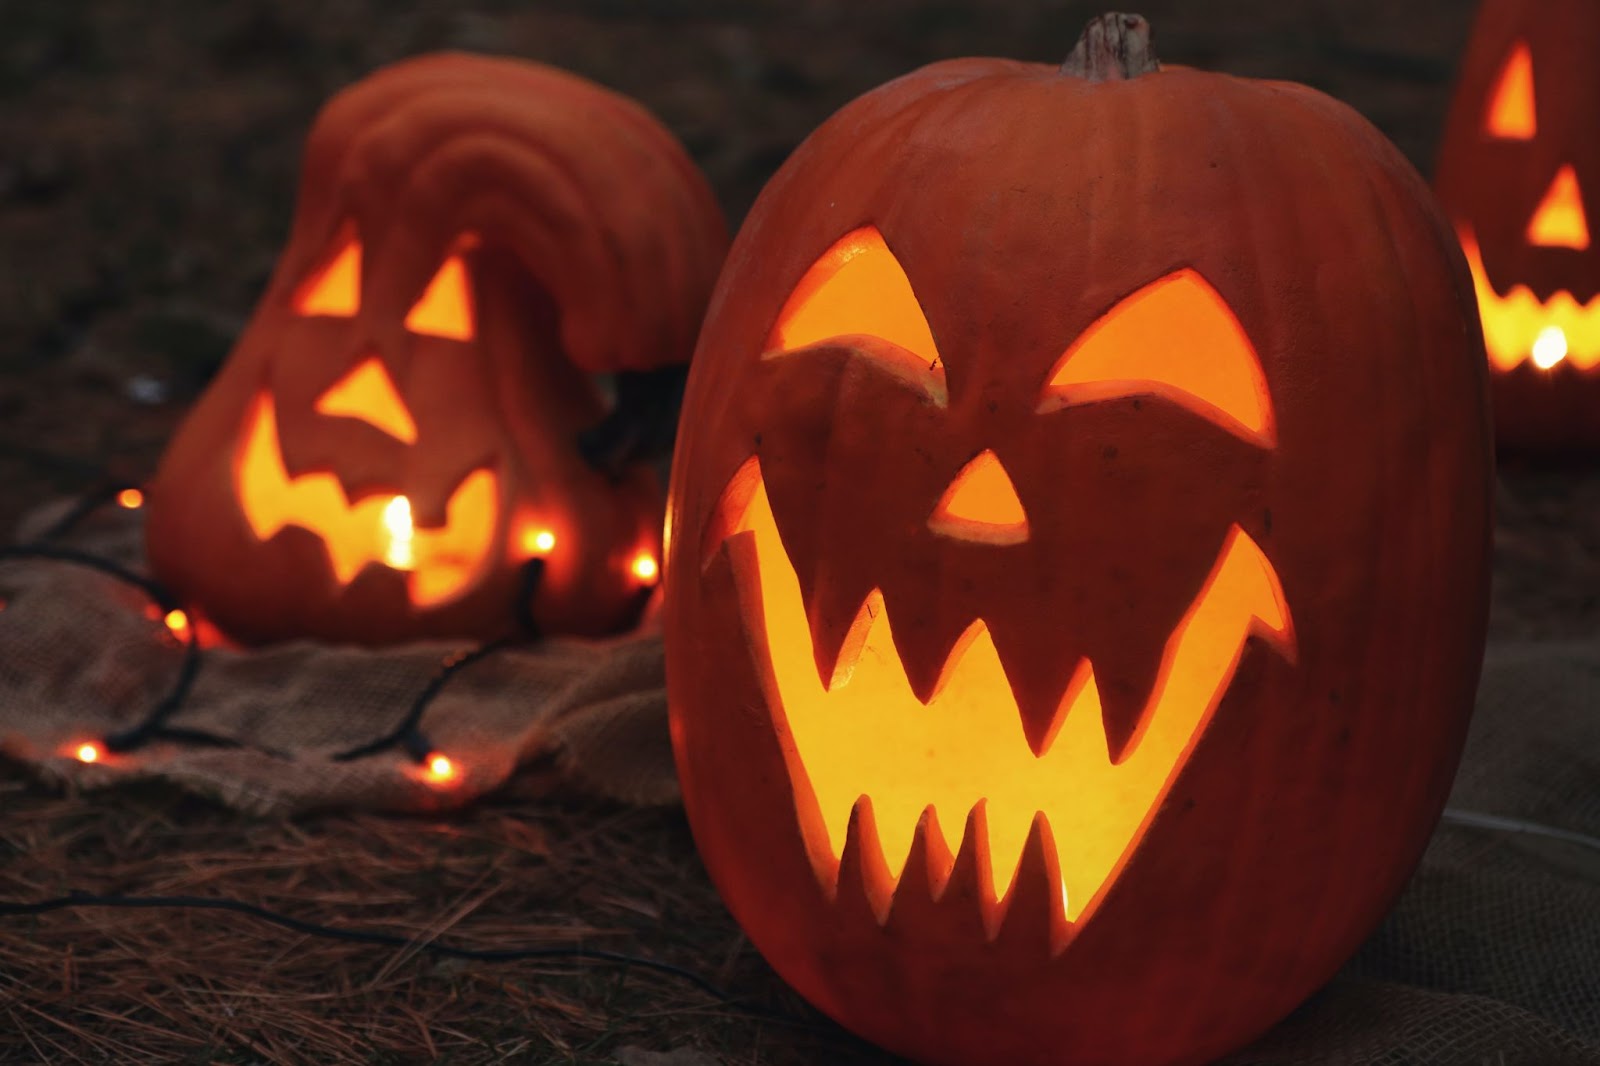
Halloween Pumpkin Carving Ideas
Carving pumpkins is a Halloween tradition that many people enjoy. If you’re looking for some carving inspiration, check out these ideas!
Scarface

To create Scarface, start by carving a large triangle out of the front of your pumpkin. This will be Tony Montana’s nose. Next, carve two smaller triangles above the nose for his eyes. Use a knife to make small cuts around the eyes and nose to create Tony’s facial features. Finally, use a black Sharpie or paint to add a mustache and eyebrows.
Toothy Pumpkin
If you want to carve a pumpkin that’s both spooky and funny, try carving a toothy pumpkin! Just cut out a big mouth and then use a knife to carve some teeth. You can even add a tongue if you want!
Pumpkin With A Mohawk

This is a great idea for those who want to add a little bit of personality to their pumpkin. Simply carve a Mohawk into the top of your pumpkin and paint it however you like. You could even add some spikes or other decorations to really make it stand out.
If you want to go the extra mile, you could even carve a face into the pumpkin so that it looks like the Mohawk is coming from the top of the head. This is sure to be a conversation starter and will definitely make your pumpkin stand out from the rest.
Vampire Pumpkin

Why not try something different this year and carve a vampire pumpkin? You’ll need to cut out two triangle eyes and a mouth. Then, use a black paint pen to draw on fangs. Finally, add some red paint around the mouth for a bloody effect. Your guests will be sure to love this spooky pumpkin!
Crazy Hair Jack-O-Lantern

To create this fun and festive pumpkin, carve a traditional jack-o-lantern face into it and then pot it with green plants or flowers. This way, guests will be greeted by a spooky yet friendly face when they come to your door. And, if you want to take it a step further, you can add some “crazy hair” made out of pipe cleaners or yarn.
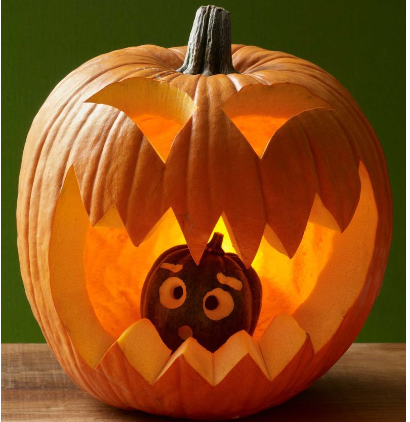
Hungry Jack

They say an apple a day keeps the doctor away, but what about a pumpkin? This jack-o’-lantern has an apple in the mouth and is sure to ward off pesky trick-or-treaters. Carve freeform eyes, and a toothy mouth, and add some fangs for good measure.
Goofy Grin Pumpkin

This pumpkin is sure to make everyone smile with its big goofy grin. For this design, start by carving out a large oval mouth. Then, use a small knife to make curved cuts for the teeth. Finally, add two triangular eyes, and you’re all done!
Medusa
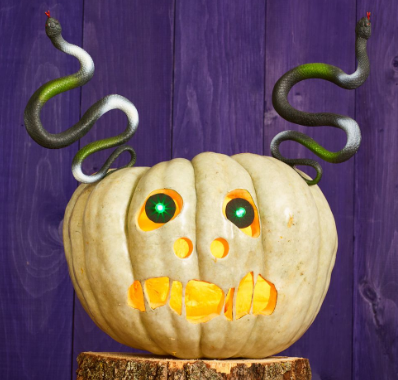
For a truly unique and spooky Halloween pumpkin, try carving Medusa. This ancient Greek monster will add a touch of mythology to your holiday décor. To carve Medusa, start by cutting out a large oval for her head. Then, use a sharp knife to carve out her snake-like hair. Finally, add some details to her face to complete the look, such as rubber snakes or green paint.
Cannibal pumpkin
This is a great idea for those who want to add some gore to their Halloween pumpkin. You’ll need two pumpkins— a large and a small pumpkin.
Carve a large mouth into the big pumpkin and then cut out small triangular eyes. For the smaller pumpkin, carve out a jagged mouth and use black paint to give it a gory look. Place the smaller pumpkin inside the larger one, and voila! You have a cannibal pumpkin!
Lollipop pumpkin
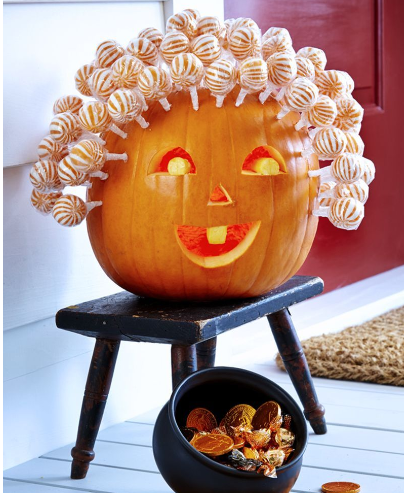
This super cute and easy pumpkin carving idea is perfect for kids. You only need a pumpkin, some lollipops, and a hot glue gun. Simply glue the lollipops onto the pumpkin in any pattern you like.
You could even use different colors of lollipops to create a rainbow pumpkin by gluing them in rainbow order. And that’s it! You now have a unique and festive pumpkin that will be a hit with the kids.
Halloween Pumpkin Painting Ideas
Carving a pumpkin is always a good idea, but sometimes you’d want to avoid using a knife. We’ve got you covered if you’re looking for a no-carve pumpkin painting idea!
Copper Painted Pumpkins
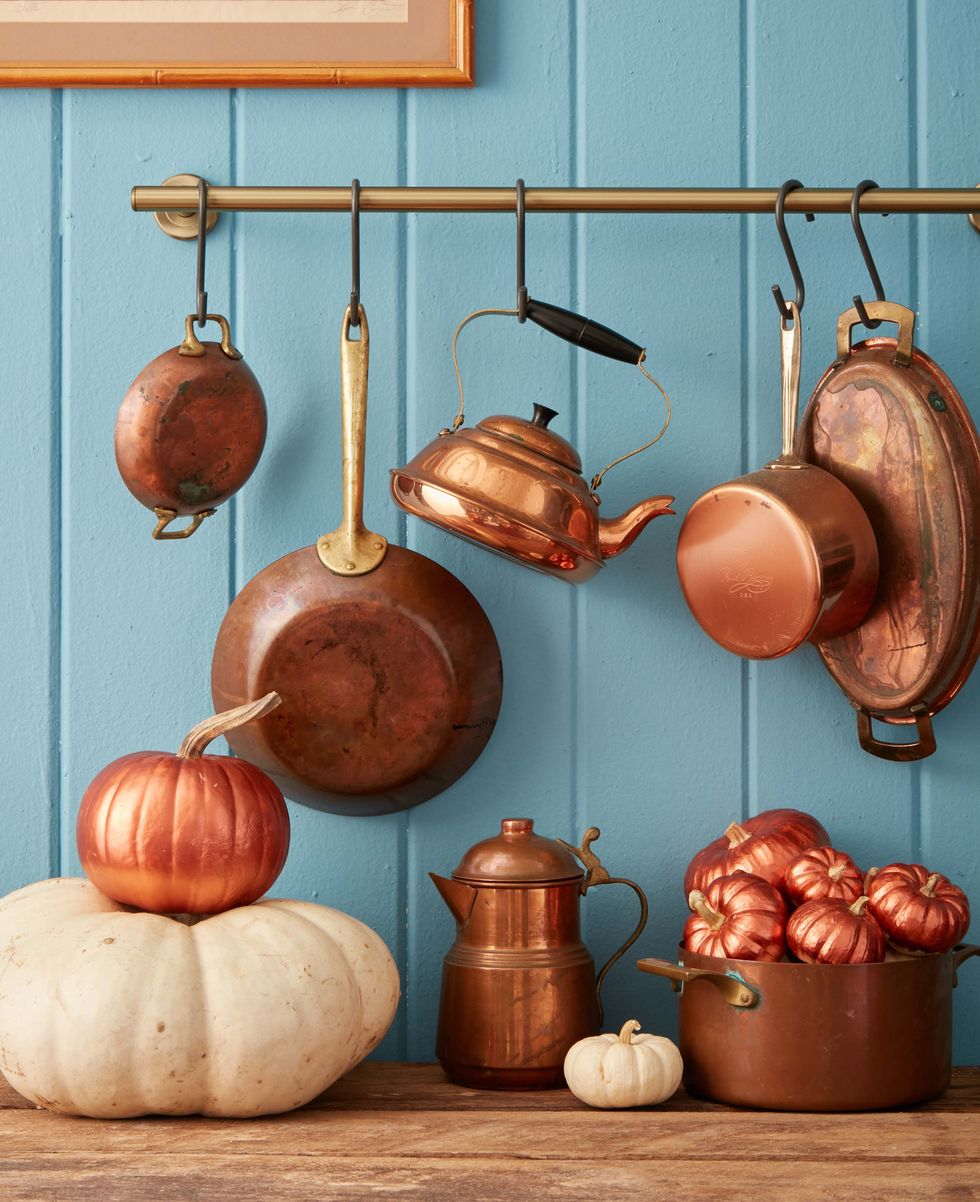
If you’re looking for a more sophisticated take on the classic pumpkin, try painting them, copper! This is a great way to add a bit of glamour to your Halloween decor.
You’ll need some copper paint and other supplies to start. First, clean your pumpkins and remove any dirt or debris. Next, use a paintbrush to apply a thin layer of copper paint to the entire surface of the pumpkin. Be sure to work in small sections, so the paint doesn’t dry before you have a chance to apply it evenly.
Silver Leaf Pumpkins
To create the silver leaf pumpkin, attach silver leaf sheets to the pumpkin with mod podge. Once dry, brush on a layer of metallic paint. Let dry, and then add another coat of metallic paint, if desired. These are so elegant and perfect for a Halloween dinner party!
Stencil Painted Pumpkins

Lightly draw a stencil pattern of your choice onto the pumpkin with a pencil. Once you have the basic shape, start painting within the lines using acrylic paint and a small brush. And if you make a mistake, no worries! Just grab a cotton swab dipped in rubbing alcohol to fix it. Let the paint dry completely before moving on to the next pumpkin.
For a fun twist, try using glow-in-the-dark paint for your stencils! Just be sure to use a flashlight to help you see the design while painting.
Whitewash Pumpkins
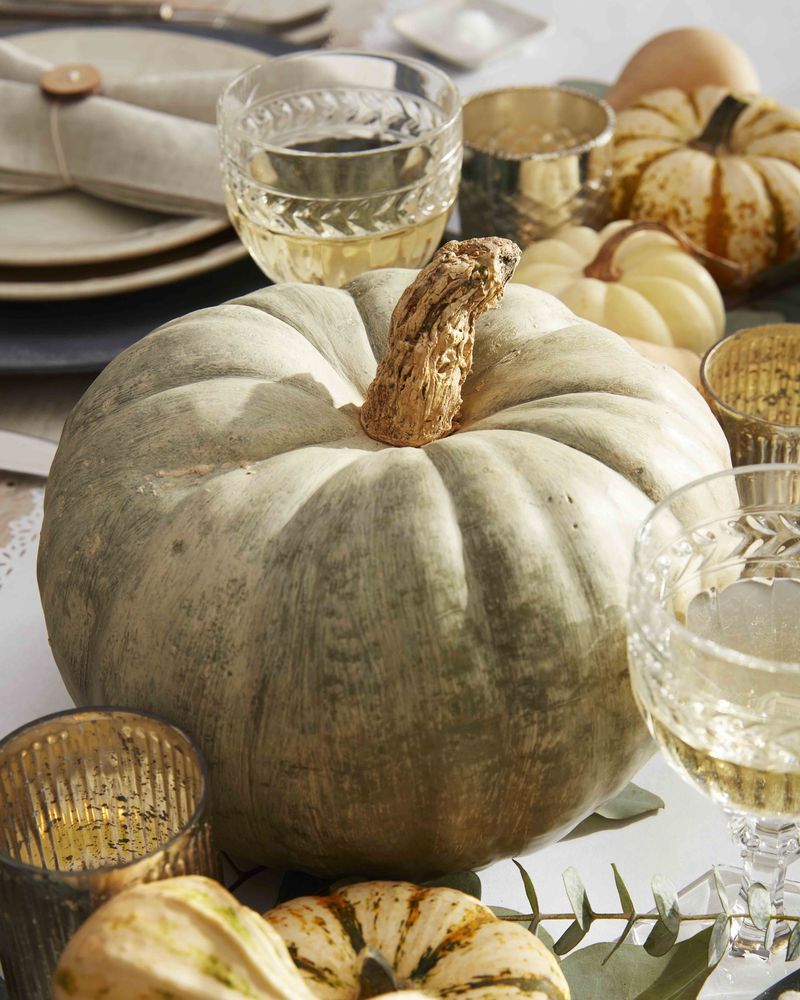
You’ll need a Jarrahdale pumpkin for this DIY. Use a flat craft brush to apply white chalk paint in sweeping motions. Let the pumpkin dry before adding a second coat, if needed. This way, the natural shape of the pumpkin will still be visible.
If you want to add a bit more dimension to your whitewashed pumpkins, try dry brushing on some metallic paint. Use a light hand so that the underlying color still shows through. We love the way copper looks against the white pumpkin!
Top off your whitewashed pumpkins with some black and white ribbon, and you’re all set! These elegant pumpkins will look great on your front porch or as part of your Halloween tablescape.
Farm Scene Pumpkins

If the farm life inspires you, consider painting a farm scene onto your pumpkin! Start by finding a large oblong pumpkin and painting a blue sky at the top. Add some fluffy white clouds, and then paint a green pasture below. Finally, add some farm animals grazing in the field and a red barn off in the distance.
This is a great project for kids, as they can get creative with their farm animal designs. Consider painting your farmhouse onto the pumpkin to add a personal touch to make your farm scene extra special.
Vintage Candy Wrapper Pumpkins
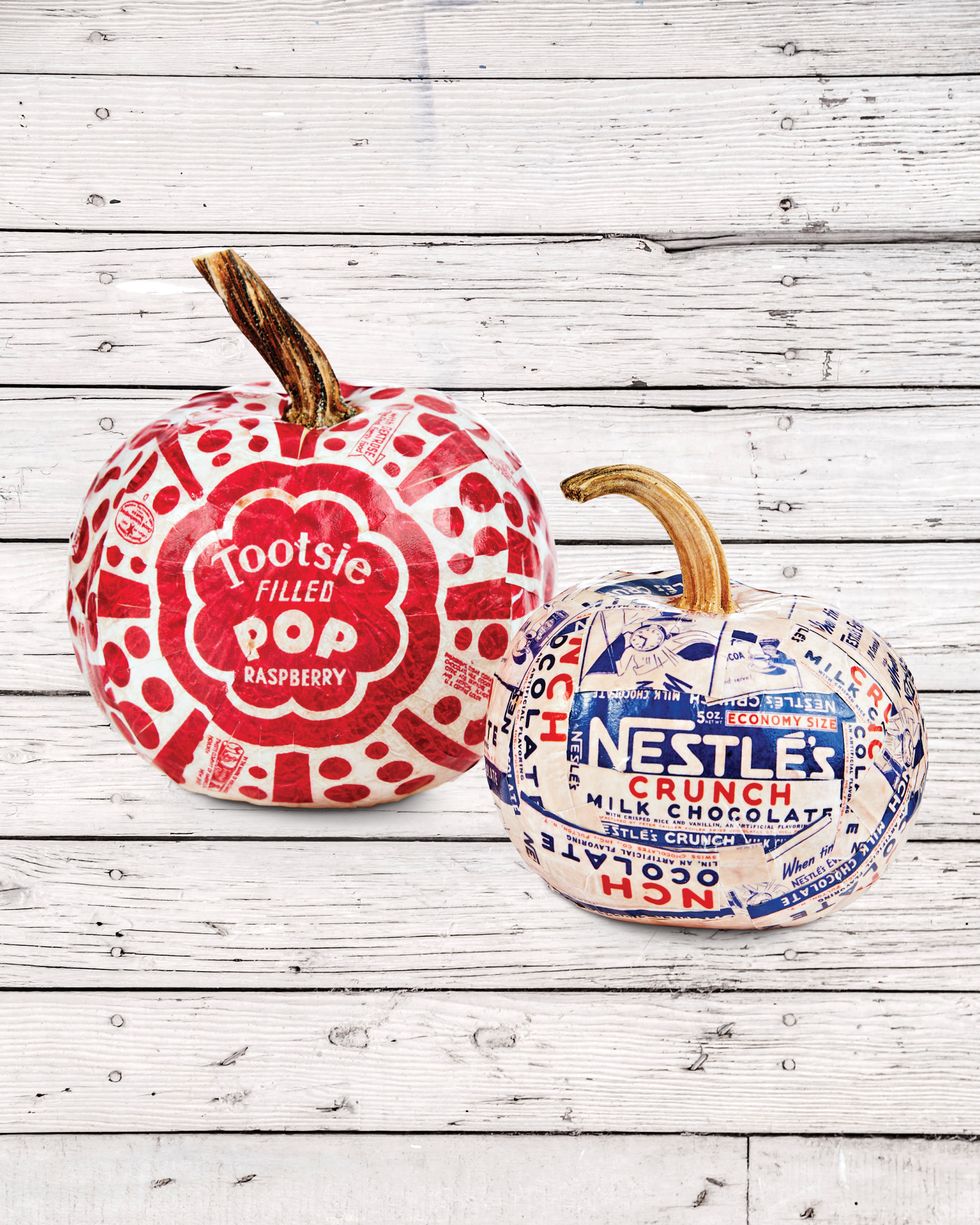
This year, ditch the carving and go for something a little more unique with your pumpkin decorating. Vintage candy wrapper pumpkins are a fun and easy way to add some personality to your Halloween display.
To make these pumpkins, simply glue on vintage candy wrappers using a glue gun. You can find candy wrappers at antique stores, thrift shops, or online. Then, simply paint your pumpkin with a coat of clear sealer to protect the wrappers.
Painted Pumpkin Scale

Imagine dishing out Halloween candies from a painted pumpkin scale! This is a great idea for kids with friends who come over often. Use different colors of paint to make this project unique. To get started, trace a hanging scale template onto your pumpkin. Then, use a brush and black paint to fill in the design.
Add colorful details like stripes or dots after the paint dries. Finally, cut out a small hole at the top of the pumpkin and insert a metal hook. Hang the pumpkin from a sturdy branch or doorknob, and fill it with your favorite Halloween candy!
Cow Pumpkin
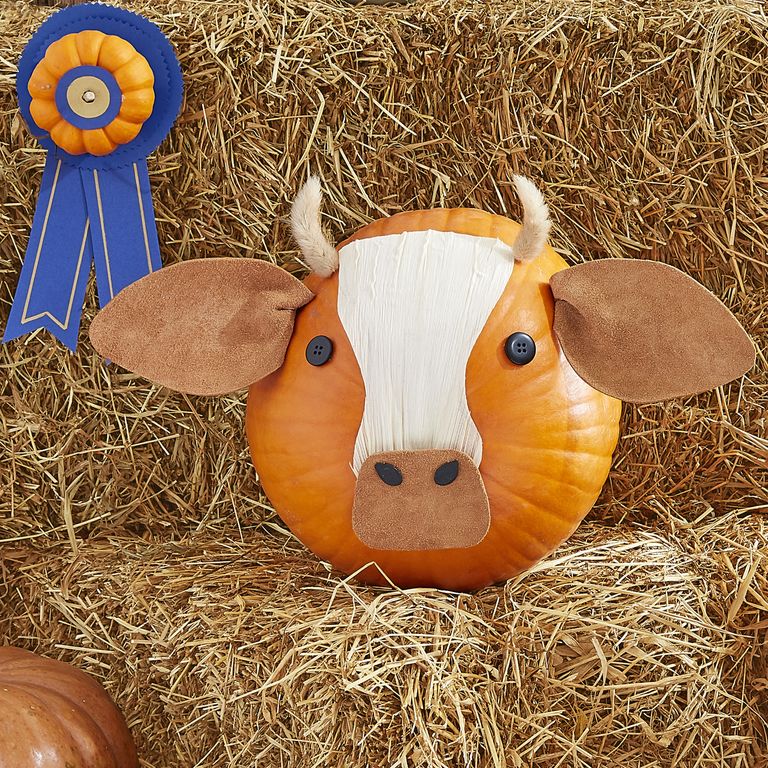
Start by tracing cow ear and nose templates on the pumpkin. Next, use a small handsaw to cut out the shapes. Now it’s time to start painting! Begin with the cow’s black spots. Add white paint around the eyes and nostrils. Finally, paint on a pink nose and mouth. Your cow pumpkin is now complete!
Rainbow-painted pumpkins

If you’re looking for a festive and colorful way to decorate your pumpkins this Halloween, why not try painting them in a rainbow of colors? This is a fun activity for kids and adults alike and will brighten your home.
To get started, you’ll need to gather some supplies. You’ll need pumpkins, some acrylic paint, paintbrushes, and a sealant to protect your work. Once you have everything, simply start painting your pumpkins in rainbow colors.
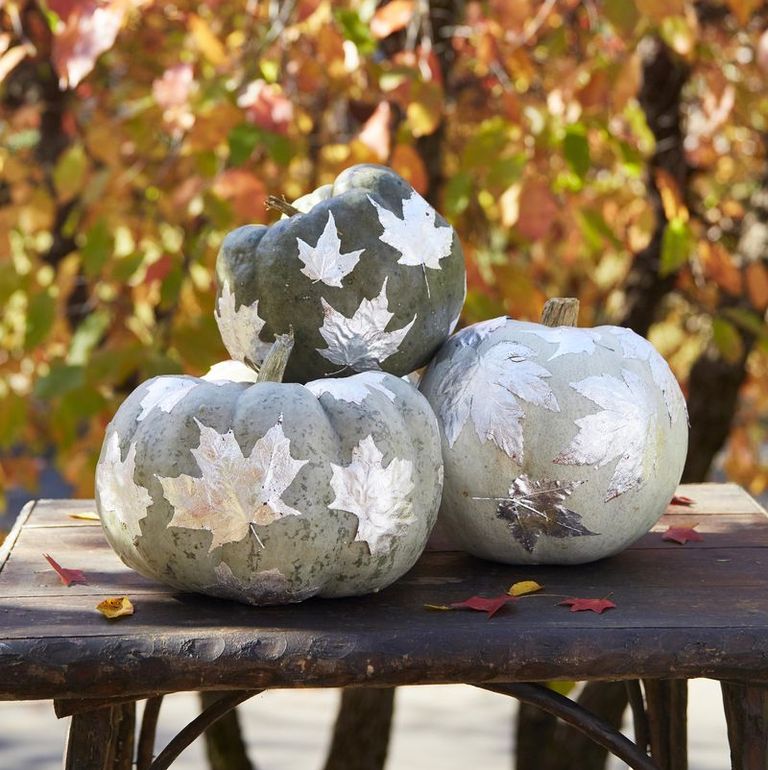
Fall Foliage Pumpkin
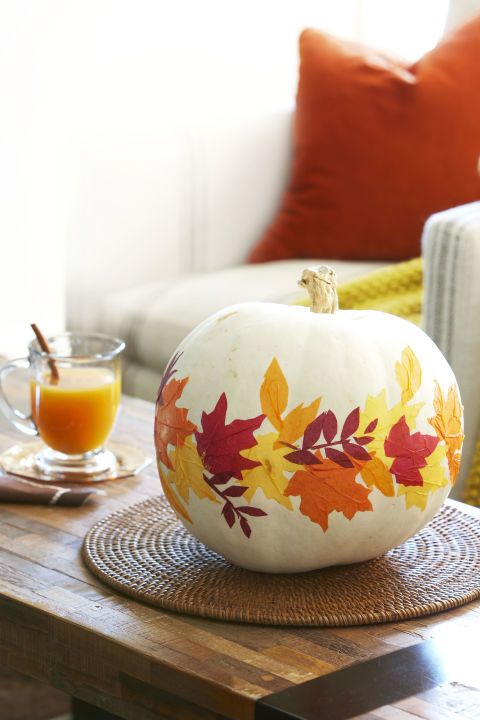
Gather leaves from your yard, or go on a nature hike to collect pretty fall foliage. Using mod podge or a similar product, adhere the leaves onto your pumpkin in an attractive design. This is a beautiful and easy way to create a one-of-a-kind pumpkin that celebrates the autumn season.
Melted Crayon Pumpkin
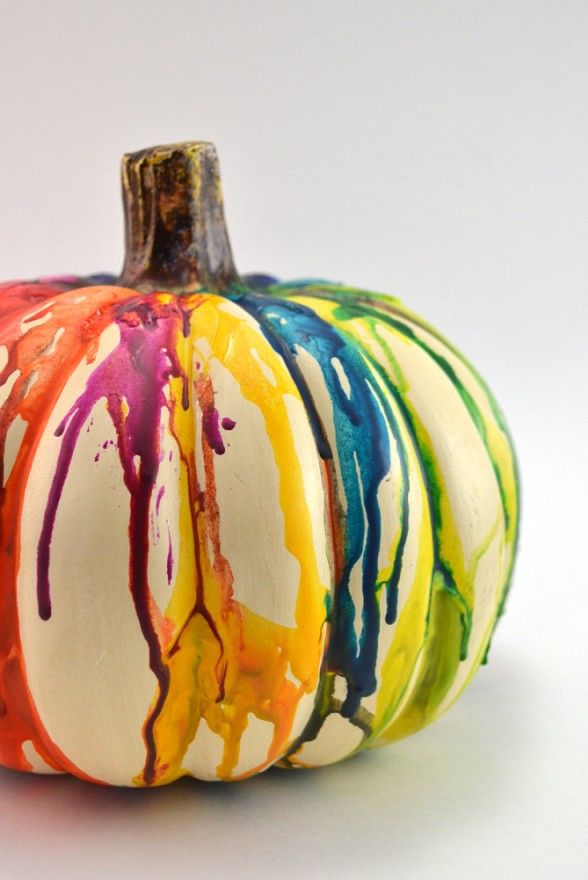
This is a really fun pumpkin carving idea that kids will love. Simply melt crayons of different colors onto your pumpkin with a hairdryer, and then use a toothpick or other sharp object to create your design. You can also try melting crayons onto wax paper and decorating your pumpkin.
To make it more fun for the kids, try using white crayons and then painting over them with black paint to create a reverse effect. So instead of a pumpkin with black lines, you’ll have a white one.
Conclusion
Pumpkins are a great way to add some personality to your Halloween display. With so many different ways to decorate them, the possibilities are endless! You can carve them, paint them, or even glue on vintage candy wrappers. Whatever you decide to do, your pumpkins will surely be a hit with your friends and family. So get creative and have fun!
If you’re looking for Halloween gift ideas for your loved ones, we’ve got you covered. We have a curated list of Halloween gifts for your kids, partners and pets. Check out Halloween gifts at our online store.